

I love wreaths for the door at Christmas, but it can be expensive to buy one or even attend a workshop to make one, so why not make one yourself? It might be easier than you think and you can make use of natural foliage much more (sourced responsibly of course lovely people).
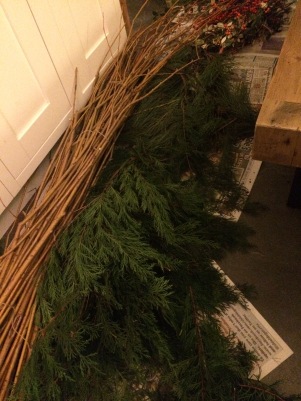
As I wanted to keep mine as natural as possible I opted to use longs lengths of willow to wrap into a circle to form the frame.
You can of course buy a wire frame to use, like the one below, if trotting off to forests on cold winter days is not your thing (think of the well deserved hot chocolate afterwards though)!!

There are several areas in the north east that have volunteer groups who look after nature reserves and often have land that require trees and hedgerow to be cleared. You must make sure you have permission but I found one in South Shields that regularly clears willow from its land so I went along with some of the volunteers, a pair of thick garden gloves and some secateurs and was able to cut around 20 long lengths of willow down to bring back home. Strip the small branches from each length so you have one long piece.
At the same time, there were some areas that had pine trees so I collected up some fallen pine cones. I also had some holly, which needed to be pruned from my garden, so I gathered that up too.
You will need some foliage, like spruce, cedar, ivy, anything evergreen, so you also need to think about where to get this. I don’t advocate cutting pieces you need from parks or public areas, but if there are areas where you know you can get this from it’s important to get permission before you do so. I had some available in my garden and my friends and neighbours were happy to supply other bits as they received a free garden prune in time for the winter! Eventually I ended up with fir, holly and hawthorn.

Before you actually start making the frame for your wreath you need to decide what to decorate it with. As my theme this year was natural, I decided to dry out my own slices of oranges, lemons and grapefruit at home to use. This is so easy and also gives a lovely smell in the home when prepping it all. Definitely gets you in the mood for Christmas!
I cut the fruit into thin slices and placed onto pieces of kitchen roll. At this time of year, most people have their heating on so put a few tea towels on your radiators and then balance the kitchen roll with the fruit across the top. If this isn’t possible, you can put the fruit on a wire tray in the bottom of the oven for several hours on a very low heat. Make sure you place a baking try underneath to catch any juice. The wire tray itself is quite important as it allows the heat to circulate. I tried both ways of drying my fruit, but for me, the natural drying on the radiator was more successful and the smell in the house was still lovely.
I also ‘scored’ small clementines from top to bottom leaving just enough intact at each end to hold the skin together. I rinsed the pine cones and placed these on the radiator with the fruit slices. This gets rid of any little insects you don’t want to bring back into the house and the warmth will help the pine cones to open up. And yes, you’re thinking right about now, wow that’s a lot of radiators!! Well yes, we used a lot space to dry them, but I did them in a few batches over 2-3 weeks, so preparing these ahead is a good idea! Once anything was dried and I was happy with it, I just popped it into a cardboard box in the kitchen to keep until I was ready.

The other item I needed was some florist wire which you can purchase online or pick some up from a local flower shop. I bought just the roll, but you can source ready-to-use cut lengths of around 10cm long which can be used for securing the fruit, if you want to make it easier, rather than cutting your own.

Making the actual wreath was easier than I expected. Willow is surprisingly supple, and it doesn’t take much to start bending it into shape. I watched quite a lot of YouTube videos when I started out making my own wreath using willow, but once I had moulded the first length into a rough circle shape and managed to add the second length by wrapping it over and under the first, I became quite confident and really started to get a good round shape going. I only used 2 – 3 lengths of the willow for my wreath as I didn’t want it to be too thick and after tucking under the final end to secure it, I spent a few minutes shaping it to get it right.
I ordered some moss from Amazon, this was something I didn’t think (or really want) to source myself! This 5kg bag did 3 wreaths and so was great for having friends round to join in the fun while the mulled wine was warming in the pan.

With your willow frame flat on the table, place decent sized handfuls of moss on the top, in batches at a time, twisting the florists wire on and around as you go until the front is completely covered and wrapped. Again, this is actually much easier to do than you expect and is surprisingly effective once you have the whole front of the wreath covered with the moss. It was at this point I picked up the wreath carefully to view it so I could see if there were any gaps or any pieces of moss that weren’t secured well enough. If so, just place a little more moss on top and cut a piece of the florist wire to go around it, securing it at the back by twisting the ends together.
Next is the layer of foliage. Put small bunches of your greenery together and place on the wreath, tucking them underneath the florists wire as you go, layering them over the cut edges so all you can see is the actual foliage, not the cut stalks. If anything doesn’t hang right, again secure by wrapping a small length of wire around and twisting together at the back. It’s good to have a bit of a pattern going with whatever pieces you have managed to gather, and just keep overlaying them going around in a circle.
Using small pieces of wire cut from the main roll, add the pine cones by tying a small piece of florist wire around the bottom and put it in place on the wreath, twisting the ends together at the around the back.
For the fruit slices, push one end of a piece of wire through the top of a fruit slice or a few slices together and position it on the wreath, again twisting the ends together on the back. You can do the same with any decoration you want to put on the wreath or you may decide to purchase a few to add more variety, like bunches of berries or cinnamon sticks.
I watched this lovely lady on YouTube before I started, to get an idea of what to do and voila!! I bought a wreath hangar and popped it onto the front door.

I turned the whole wreath making activity into a bit of a get together with my friends. We sat around the kitchen table with all our supplies, some mulled wine and Christmas tunes playing in the background. It was great to see each wreath come together and really good fun – plus plenty of people to help clear up at the end because I must warn you, it gets really messy! And make sure you wear gardening gloves, it can be scratchy too! There is so much scope to add as much or as little as you want to your wreath and the beauty is, it will last for a really long time.
After Christmas was over I cut the wire away and removed the moss and I had a lovely willow decoration which I could use somewhere else in the house. You can add spring or autumnal flowers and leaves to it during the year, using the remaining florists wire to attach, to have an all year round decoration at home.
I’ve just ordered my moss for this year and in the process of checking my supplies of florist wire and pine cones, ready for another festive evening in December of wreath making with friends and family.
I hope you found this useful and it assures you that a homemade wreath can be enjoyable and fairly easy to do. If you are inspired to try this out, please let me know and send pictures!! I’d love to see them!
I quite fancy giving this a go! I do enjoy the run up to Christmas.
November 20, 2019 at 2:53 pmI thoroughly enjoyed the whole process, it was quite satisfying knowing i had collected all the basics myself – the addition of the mulled wine to the evening itself was pretty good too!
November 20, 2019 at 4:17 pm